Oracle Database Operator for Kubernetes on Google Cloud
Authors: Kuassi Mensah— Jyoti Prakash Verma — Paramdeep Saini — Yunus-Qureshi

As part of Oracle’s Multi-Cloud partnership with third-party Clouds, including Azure, GCP, and AWS, this blog post describes the steps for installing the Oracle Database Operator for Kubernetes (a.k.a. OraOperator) on the Google Kubernetes Engine (GKE) and provisioning a Single Instance Database (a.k.a. SIDB).
Prerequisites — Create a GKE Cluster
You first need to create a Google Kubernetes Engine (GKE) cluster. The Google Cloud Platform (GCP) offers two modes for provisioning GKE:
- The Autopilot mode, allows you to focus on your services and applications, while GKE manages your nodes and infrastructure. We did not perform our tests using this mode.
- The standard mode lets you control the configuration of the individual nodes.
For our validation of OraOperator on GKE, we created a single node cluster in standard mode, using the Google Cloud Console.

Alternatively, you may use this script by the Google folks to create the same cluster.
./oopgke.bash step1_create_infraThen use the following links to configure your client machine for accessing the GKE cluster using kubectl
At this stage, you have a 1-node GKE cluster installed and your client has been configured to access it using kubectl.
kubectl get nodes -o wide
The next steps, which consist of installing OraOperatore and provisioning a Single Instance Database, are business as usual, i.e., similar for all CNCF-compliant Kubernetes engines.
Install OraOperator on GKE
- Install the certificate manager using the following command
kubectl apply -f https://github.com/cert-manager/cert-manager/releases/download/v1.16.2/cert-manager.yaml2. Namespace deployment
To reduce the scope of OraOperator deployment and monitoring to the default namespace, as opposed to a cluster-wide deployment, you need to grant service account with resource access to the default namespace, using the following command
kubectl apply -f rbac/default-ns-role-binding.yaml
3. Edit the oracle-database-operator.yaml to add the default namespace under WATCH_NAMESPACE then save it.
- name: WATCH_NAMESPACE
  value: "default"
4. Finally, apply the just saved yaml file using the following command; this will install/deploy OraOperator.
kubectl apply -f oracle-database-operator.yaml5. Check that the operator is up and running using the following command
For a wide view use the following command:
$ kubectl get all -n oracle-database-operator-system -o wide
For a narrow view, use the following command:
$ kubectl get pods -n oracle-database-operator-system
Provisioning a Single Instance Database (SIDB)
A single-instance database has a one-to-one relationship between the database server instance (memory and processes) and the database itself (i.e., the database files). It is the most basic deployment option of the Oracle Database.
Ensure Sufficient Disk Space in the Kubernetes Worker Node
The SIDB container images are stored on the Kubernetes worker node. These images can be as large as 10 GB therefore, you need to ensure the K8s nodes have enough free space
Resource Privileges
The SIDB controller needs the following Kubernetes privileges.
The controller automatically acquires these privileges from the cluster, you need not take any action. Additional optional Kubernetes resource privileges may also be specified (see the OraOperator SIDB doc for more details).
Prepare the Oracle Container Image
The supported Oracle Database releases include Enterprise and Standard Editions for Oracle Database 19c and later, Express Edition for Oracle Database 21.3.0 only, Oracle Database Free 23.6.0 and later, and Oracle Database Free lite 23.6 and later.
You can build a SIDB image from the source by following these instructions or, better, use the pre-built images available here (for the Enterprise edition) and here (for the Free edition).
You need to sign in and accept the required license agreement if you have not already done so.
To pull the image from the Oracle Container Registry, you need to create a Kubernetes secret (named oracle-container-registry-secret for example) as follows:
$ kubectl create secret docker-registry oracle-container-registry-secret --docker-server=container-registry.oracle.com --docker-username='<oracle-sso-email-address>' --docker-password='<container-registry-auth-token>' --docker-email='<oracle-sso-email-address>'Alternatively, use the docker config.json or podman auth.json (after successfully logging in).
$ docker login container-registry.oracle.com
$ kubectl create secret generic oracle-container-registry-secret  --from-file=.dockerconfigjson=.docker/config.json --type=kubernetes.io/dockerconfigjson
or
$ podman login container-registry.oracle.com
$ kubectl create secret generic oracle-container-registry-secret  --from-file=.dockerconfigjson=${XDG_RUNTIME_DIR}/containers/auth.json --type=kubernetes.io/dockerconfigjson
Edit the ## Database image details section of the singleinstancedatabase_create.yaml file as follows:
## Database image details
image:
  pullFrom: container-registry.oracle.com/database/enterprise_ru:21.17.0.0
  pullSecrets: oracle-container-registry-secret
Set Up Volumes for Database Persistence
Volumes are required for the persistent storage of the database files. There are two options: dynamic persistence or static persistence.
- Dynamic Persistence: in this mode, a persistent volume is provisioned by mentioning a Cloud infrastructure-specific storage class in the singleinstancedatabase_create.yaml file. The supported access mode for this class is
ReadWriteOnce.TheReclaim Policyof such dynamically provisioned volumes isDeletei.e., meaning that the volumes are deleted when their corresponding database deployment is deleted. - Static Persistence: in this mode, you must create a volume manually, and then use the name of this volume with the
<.spec.persistence.datafilesVolumeName>field, which corresponds to thedatafilesVolumeNamefield of the persistence section in the singleinstancedatabase_create.yaml file.
For this validation test, we will use the dynamic persistence option. Let’s get details of the available storage classes in GCP using the following command:
$ kubectl get sc
We will use “standard-rwo”, the default storage class.
Kubernetes Secret
The following command creates a Kubernetes secret named “db-admin-secret” (for SYS, SYSTEM, and SYSADMIN users), with the oracle_pwd key mapped to the actual password specified in the command.
$ kubectl create secret generic db-admin-secret --from-literal=oracle_pwd=<specify password here>Note: theadminPassword field in the singleinstancedatabase.yaml file refers to that secret.
Check the successful creation of the secret using the following command:
$ kubectl get secret -n default
Provision the SIDB
Edit the singleinstancedatabase_create.yaml file and replace:
storageClass: “oci-bv” by “standard-rwo”
Save then apply the just edited file, using
$ kubectl apply -f singleinstancedatabase_create.yamlWait for the creation notification singleinstancedatabase.database.oracle.com/sidb-sample created
After the creation, the SIDB needs to be deployed, which takes a few minutes. You can monitor the progress of the provisioning in the log file using the following command:
$ kubectl logs -f pod/sidb-sample-8hmw7The verbose output is not displayed here however, the following message will indicate the completion of the deployment.

Get the status of the deployment using the following command (the status should be “Running”):
$ kubectl get all -o wide
Get a summary of the deployed SIDB as follows:
$ kubectl get singleinstancedatabase sidb-sample -n default
Get more details as follows
$ kubectl describe singleinstancedatabase sidb-sample -n defaultOutput not shown, too verbose and lengthy!
Confirm that the database is healthy
$ kubectl get singleinstancedatabase sidb-sample -o "jsonpath={.status.status}"Healthy
Get the CDB connect string
$ kubectl get singleinstancedatabase sidb-sample -o "jsonpath={.status.connectString}"34.70.98.61:31625/ORCL1
Get the PDB connect string
$ kubectl get singleinstancedatabase sidb-sample -o "jsonpath={.status.pdbConnectString}"34.70.98.61:31625/ORCLPDB1
Configuring a FrontEnd Load Balancer
By default, external connections from outside the K8s cluster to the database are performed through the NodePort service (30000-32767 range) however, in Cloud environments, the best practice is to front-end the SIDB with a load balancer. Configuring it is as simple as setting the loadBalancer attribute to true in the singleinstancedatabase_create.yaml file as follows.
loadBalancer: trueAlternatively, use the kubectl patch command as follows:
$ kubectl --type=merge -p '{"spec":{"loadBalancer": true}}' patch singleinstancedatabase sidb-sampleAfter a few minutes, the load balancer will be provisioned, and an external IP will be assigned.
$ kubectl get all
Secure TCPS Connection
To increase security, you can configure the tcpsListenerPort service thereby restricting external communications to the SIDB through the TCPs listener (or TCPs endpoint).
$ kubectl patch --type=merge singleinstancedatabases.database.oracle.com sidb-sample -p '{"spec": {"enableTCPS": true}}'After a few minutes, the service will be enabled and confirmed using the following commands (checking the status)
$ kubectl get singleinstancedatabase sidb-sample -o "jsonpath={.status.isTcpsEnabled}"When TCPS is enabled, a self-signed certificate is generated and stored in a wallet under/opt/oracle/oradata/clientWallet/$ORACLE_SID in the pod.
Regular Connections
At this stage, you can connect to the database using the connect strings returned by the commands above. You may use any supported client or the good old Sqlplus command line interface:
$ sqlplus sys/<.spec.adminPassword>@34.70.98.61:316/ORCL1 as sysdbaTCPS Connections
Copy the generated wallet directory onto a client machine, under “wallet_dir” (for example), using the following commands (from the client machine)
$ mkdir wallet_dir
$ kubectl cp $(kubectl get pods -l app=sidb-sample -o=jsonpath='{.items[0].metadata.name}'):/opt/oracle/oradata/clientWallet/ORCL1 ./wallet_dir
The wallet dir includes several files such astnsnames.ora and sqlnet.ora files.
$ ls wallet_dir
cwallet.sso  cwallet.sso.lck  ewallet.p12  ewallet.p12.lck  sqlnet.ora  tnsnames.ora
The tnsnames.ora file has short TNS aliases for connecting to the database (instead of using the lengthy full descriptor). The TNS_ADMIN environment variable refers to the location of the tnsnames.ora file.
$ cd wallet_dir
$ export TNS_ADMIN=$(pwd)
$ sqlplus sys@ORCL1 as sysdba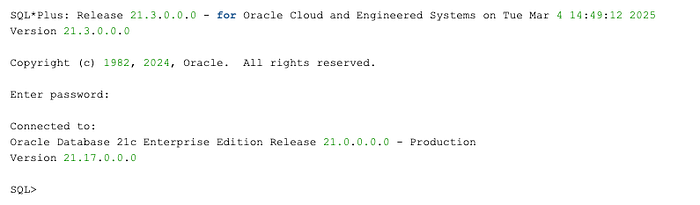
This is it!
Clean Up
Housekeeping!
Run the following commands to delete all the CRD instances, APIService, RBAC, and deployments in the default namespace.
$ kubectl delete singleinstancedatabase.database.oracle.com --all -n default$ cat rbac/* | kubectl delete -f -$ kubectl delete -f oracle-database-operator.yaml --ignore-not-found=true
Further Readings
- The SIDB documentation.
- The Oracle Database Operator for Kubernetes.
- Google’s “Deploying the Oracle Operator on GKE” was a source, published prior to this blog post.
